![]()
![]()
![]()
![]()
|
|
|
|
|
|
||
This section describes the steps involved in installing the TestDriver and configuring it to perform the intended functions. TestDriver is installed using Engineering Tools Desktop installer. You can run the Engineering Tools Desktop installer in the following modes:
Alternatively, the TestDriver can be installed by unzipping the
engtools.zip file in which case Engineering Tools Desktop
installer is not required.
Run the Engineering Tools Desktop installer from the command line with the following options.
%EPOCROOT%epoc32\engineeringtools\engtools.exe [/S] [/D=installation_path]
where:
/S, when specified, runs the installer in silent mode
/D is the location where TestDriver would be
installed. This option is useful when run in silent mode.
If /S option is not specified, the installer will run
interactiverly and c:\apps\engtools would be the default
installation folder.
|
|
Installing the TestDriver using the Engineering Tools setup wizard is known as Interactive installing.
Complete the following steps to install TestDriverV2 on your system interactively:
Navigate to the folder \epoc32\EngineeringTools\. Look
for engtools.exe application.
Click on the wizard icon, this starts the Symbian Engineering Tools Setup. Read the instructions thoroughly.
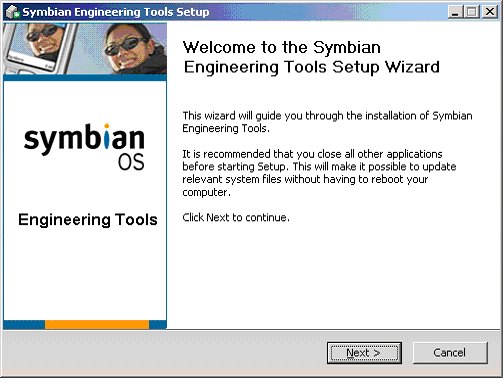
Symbian Engineering Tools Setup
Click Next to proceed with the installation. This opens Choose Components dialog.
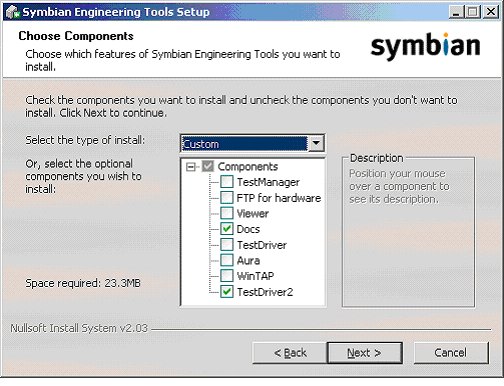
Choosing TestDriver
Select Custom, select 'TestDriver2', WinTap and 'Docs' from the list. By default, all the tools in the list will be installed.
Click Next to move to Choose Install Location dialog.
Click Next, this will install the Symbian Engineering Tools in
c:\apps\engtools. Browse to a different location to install in a
folder of your choice.
Click Next to move to Choose Start Menu Folder dialog.
Select the start up menu folder.
Click Next to move to WinTAP Configuration dialog.
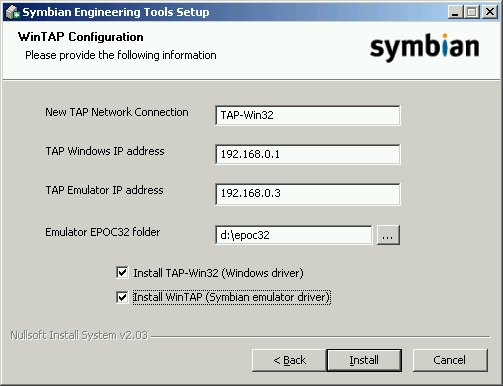
Wintap configuration
Retain the default network connection and IP addresses for Windows and the Emulator.
Select the location to copy the epoc32 folder.
Check 'Install TAP-Win32' and 'Install WinTAP' boxes to install the WinTap on the Device and on the PC.
Click Install to move to Installing dialog.
Click Next to proceed with installation. When the installation is finished a log save pop-up opens.
Click Yes to save the installation logs.
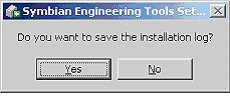
log save pop up
Click Finish.
The above steps install the TestDriver. The installer adds the
installation path of TestDriver to the PATH environment variable.
For example, if you have chosen d:\apps\engtools as installation
path, the PATH will be pre-pended by
d:\apps\engtools\testdriver2. When you unzip the The Uninstaller
is saved to the same location.
|
|
This assumes that you already have the Engineering Tools kit installed on your system. Complete the following steps to re-install the TestDriver.
Start the installer as outlined in steps 1 and 2 in the Installing TestDriver section. The following dialog opens.
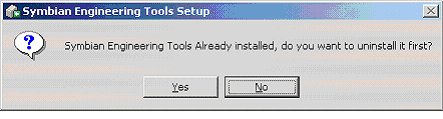
You have the following options:
Click Yes to remove the entire Engineering Tools kit. This take you to a new interactive installation following through all the steps in the Installing TestDriver section.
Click No to retain the Engineering Tools kit. This opens Choose components dialog, allowing you to add or remove the components selected in step 4 in the Installing TestDriver section.
Deselect TestDriverV2.
Click Next. This uninstalls the TestDriver.
To re-install the TestDriver, follow the steps outlined in Installing TestDriver.
Click No, this option will not remove the engineering tools Kit.
Select TestDriver2 in Choose Components in step 4 in the Installing TestDriver section. Complete all the steps to reinstall TestDriver.
|
|
To install the TestDriver automatically, add the following command to your scripts:
%EPOCROOT%epoc32\engineeringtools\engtools.exe /S /D=d:\apps\engtools
This command uninstalls the complete Symbian Engineering Tools kit and installs only the TestDriver2 and the Doc component.
|
|
When the installer is run, the uninstaller is saved to the same
location where engtools.exe is saved. Navigate to the location and
double-click the EngToolsUNInstaller.exe file. This removes the
complete Symbian Engineering Tools kit. Do not delete the TestDriver manually.
Note: Currently, the uninstaller does not clean up the PATH.
|
|
Configuring the TestDriver using the config command
involves setting up your environment and defining the following information:
The EPOC drive, that is the drive where the EPOC32 tree has been installed.
The XML root, that is the root path to your XML tree that defines your test hierarchy.
The repository location, that is the root path where all binaries and related test files are stored.
The result location, that is the root path where the test logs are stored.
The source root location,that is the root path where the source code is stored.
You can view or modify these settings using appropriate option of
config command.
To display the current configurations use the command:
> testdriver config
Following settings are made to configure the TestDriver using
config command.
To set the EPOC drive, use the command:
> testdriver config -e <path to EPOC drive>
For example, testdriver config -e h:\ sets the EPOC drive
to h:\.
To set the root path to your XML structure, use the command:
> testdriver config -x <path to XML root>
For example, testdriver config -x
h:\development\personal\CompVisitor\XML sets the root path to the XML
structure.
To set the root path to the repository:
> testdriver config --repos <path>
For example:
> testdriver config --repos d:\repos
To set the root path to the test results, use the following command:
> testdriver config -c <path to result location>
This is used to set the root path for the test results and test logs.
To set the root path to the source code, use the following command:
> testdriver config --source <path to source>
TestDriver allows you to set more than one option using the
config command. For example, all the above settings can be done in
a single command line:
testdriver config  -e h:\ --repos d:\repos -c d:\results --source p:\group\testsrc -x
          h:\dev\personal\CompVisitor\XML
Once you have configured the above settings correctly, you can start using the TestDriver. For more options, see config.
|
|
TestDriver uses the logging.properties file to configure
the logging information where you can set the default values for logging
levels, handlers and formatters for a log message.
An example for thelogging.properties file would be:
# Specify the handlers to create in the root logger
    # (all loggers are children of the root logger)
    # Create two handlers
    handlers = java.util.logging.ConsoleHandler, java.util.logging.FileHandler

    # Set the default logging level for the root logger
    .level = ALL

    # Set the default logging level for new ConsoleHandler instances
    java.util.logging.ConsoleHandler.level = INFO

    # Set the default logging level for new FileHandler instances
    java.util.logging.FileHandler.level = ALL

    # Set the default formatter for new ConsoleHandler instances
    java.util.logging.ConsoleHandler.formatter = java.util.logging.SimpleFormatter

    # Set the default logging level for the logger named com.symbian
    com.symbian.level = ALL
Configuring the logging information involves setting up the following
in the logging.properties file:
A logging level can be used to control the logging output. A log
message can be differentiated by it's level that can be configured by editing
the line containing .LEVEL = INFO in the
logging.properties file.
The supported logging levels in descending order are:
SEVERE (highest value)
WARNING
INFO
FINE
FINER
FINEST (lowest value)
Enabling logging at a given level also enables logging at all higher
levels. For example, when you set .LEVEL = INFO for a message,
logging at SEVERE and WARNING levels is also enabled.
Handlers allow you to output logs to different locations such as a console, a file, a stream, memory or a TCP socket on a remote host. Multiple handlers are used to output to each of these locations (for example, print all log messages to a file or to the console). Handlers include standard Java Handlers, including FileHandler, ConsoleHandler, MemoryHandler, StreamHandler and SocketHandler. However, Symbian also provides two custom handlers EmailHandler and NetSendHandler that allow you to output logging messages to an email address and NetSend location respectively.
You can configure the log message to a handler using the
logging.properties file:
handlername.handlerproperties = propertiesvalue
For example:
java.util.logging.FileHandler.pattern = TestDriver%g_%u.log
This sets up the FileHandler to use the pattern
TestDriver&g_%u.log while naming the log files.
In the following example:
com.symbian.et.utils.log.EmailHandler
com.symbian.et.utils.log.NetSendHandler
The EmailHandler allows you to email the log messages to
an email client and the NetSendHandlerallows you to net-send the
log messages.
Example of the possible properties configurations for these handlers are as follows:
com.symbian.et.utils.log.NetSendHandler.numbererrors = 10
This sets the maximum number of errors that can occur before sending an email.
com.symbian.et.utils.log.NetSendHandler.sendlevel = WARNING
This sets the meaning of the error.
com.symbian.et.utils.log.NetSendHandler.ip = 102.125.0.2
This sets the IP address to send the net-send message.
com.symbian.et.utils.log.EmailHandler.numbererrors = 5
This sets the maximum number of errors that can occur before sending an email.
com.symbian.et.utils.log.EmailHandler.sendlevel = WARNING
This sets the meaning of the error.
com.symbian.et.utils.log.EmailHandler.fromaddress = [email protected]
The address from where the log messages have to be sent.
com.symbian.et.utils.log.EmailHandler.toaddress = [email protected]
The address to send the log messages.
com.symbian.et.utils.log.EmailHandler.server = [email protected]
The SMTP server to send the log messages.
Log messages can be sent to locations stated in the
Logging Handlers section, as either
simple text or as XML. Output formatters allow you to organise your output.
Java includes the standard formatters, SimpleFormatter and
XMLFormatter. Additionally, Symbian provides
com.symbian.et.utils.log.SimpleFormatter, a simpler formatter to
format your output.
More information on configuring the properties file to set the logging levels, handlers and formatters can be found in Configuring the logging properties and Logging messages.
|
|
|
Copyright ©2008 Symbian Software Ltd. |
|
![[Top]](https://docs.huihoo.com/symbian/s60-3rd-edition-cpp-developers-library-v1.1/GUID-35228542-8C95-4849-A73F-2B4F082F0C44/html/SDL_93/a_stock/btn_top.gif)